The Kitchen-Corner Mushroom Bucket: Turning Coffee Waste into a December Supper
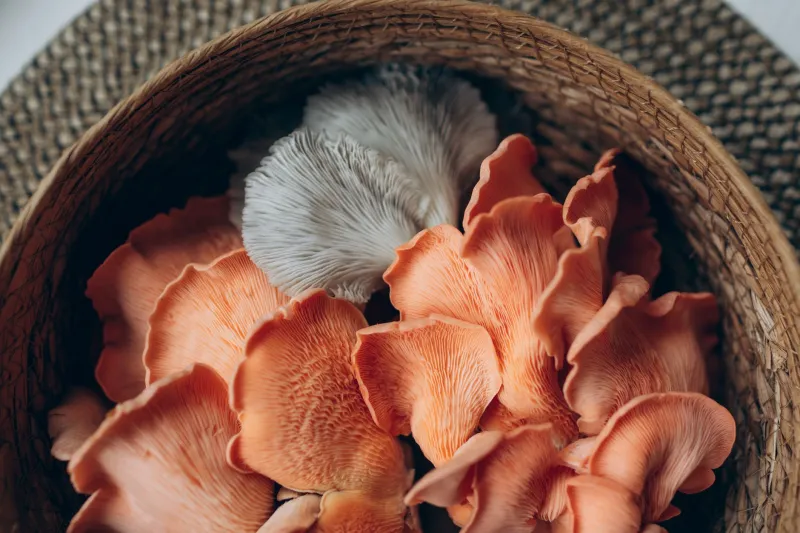
Oyster mushrooms sound like a job for a heated greenhouse, a dedicated mushroom shed or someone with more patience than most of us can muster in mid-November. In practice, a modest crop can happen in the corner of a cool kitchen, using a food-grade bucket, a bag of straw and the spent coffee grounds that would otherwise go into the bin. As of 12 November 2026, with the garden slowing down and the kitchen taking over, it is a good moment to start a small indoor batch. The reward is not a forest of mushrooms, but a handful or two of something fresh before Christmas — and a neat way to close the grow-cook-share loop.
Start with spawn, not guesswork
The one thing worth buying properly is mushroom spawn. Oyster mushrooms are not a crop to improvise from wild finds, and a reputable UK supplier will sell grain or sawdust spawn suited to indoor growing. A small bag is enough for a kitchen-scale bucket; you do not need a laboratory setup. Order it now and keep it cool until you are ready. The rest of the kit is humble: a clean 5–10 litre food-grade bucket, some straw, spent coffee grounds and a spray bottle.
Coffee grounds are easy to source if you ask nicely at a local café. Explain that you want them for mushroom growing, not the compost heap, and ask for grounds from the day's batch rather than a soggy bag that has been festering at the back of the counter. At home, use them within a day or so. Oyster mushrooms are vigorous, but they are not a licence to ignore cleanliness. Wash your hands, use a clean bucket and keep the work surface tidy.
Build the bucket in layers
Drill a few 1cm holes around the sides of the bucket, spaced roughly a hand's width apart and sitting a little above the base. These are the fruiting holes. Chop straw into short lengths — scissors or a garden shredder will do — and soak it until damp but not dripping. Some growers pasteurise straw with hot water first; for a first bucket, buying straw pellets intended for mushroom growing is a simpler route if you want to reduce the guesswork.
Layer damp straw, spent coffee grounds and a sprinkle of spawn into the bucket, finishing with a cap of straw. Aim for coffee grounds to make up no more than about a third of the mix. Too much wet coffee can compact and sour before the mushroom mycelium gets going. Put the lid on loosely, or cover the top with a clean plastic bag with a few holes poked in it, and place the bucket in a cool, dim corner. A temperature around 15–18°C suits many oyster strains; a cold utility room or the end of a kitchen worktop away from the oven is often better than an airing cupboard.
Humidity without a greenhouse
The white fuzz of mycelium should begin to run through the mix within a week or two. This is the quiet stage, and it is easy to fuss too much. Check the bucket every few days. If the surface looks dry, mist lightly. If water is pooling at the bottom, pour it away and ease off. A dry kitchen in winter can be the biggest hurdle, so stand the bucket in a shallow tray with a little water, or drape a loose plastic bag over the top without sealing it. Fresh air matters as well as moisture; a stuffy, soaking bucket is more likely to grow mould than mushrooms.
Green mould is the usual disappointment. If a small patch appears, remove it carefully and improve airflow, but if the whole surface has gone green or black, start again with fresh materials. White mould that smells pleasantly mushroomy is what you want. Keep the bucket away from direct heat and radiators, and do not put it in full sun.
Pins, caps and the first harvest
After two or three weeks, tiny pins may appear through the holes. They look fragile, but they are surprisingly determined. Mist around them rather than directly on them, and keep the corner cool. The mushrooms are ready when the caps are still slightly curled at the edges and before they flatten and turn papery. Twist or cut the cluster cleanly at the hole. Expect a few flushes rather than one heroic crop; a small bucket might give two or three pickings if you keep the humidity steady between them.
A simple winter supper
Oyster mushrooms are best cooked thoroughly, not eaten raw. For a quick December supper, tear the clusters into strips and fry them in butter with garlic and thyme until the edges brown. Pile them onto hot toast, add a squeeze of lemon and a handful of parsley, and call it dinner. They also work in a noodle broth with shredded greens, or stirred through a barley risotto. The point is not to bury them; a small crop deserves a simple plate.
Back to the plot
When the bucket stops cropping, do not tip the spent substrate straight onto the nearest rose bush. Break it up and add it to the compost bin, or use it as a mulch after it has cooled and settled. Spent mushroom compost is a useful soil conditioner, and the straw and coffee grounds will continue to break down. It is a modest closing of the loop: kitchen waste becomes mushrooms, mushrooms become supper, and the leftovers go back to the plot. Share the first picking with a neighbour if you can. A small bucket in a kitchen corner is not going to feed the street, but it is a pleasant thing to hand over at the door in the dark weeks before Christmas.