Tops First, Sprouts Later: A Late-Autumn Greens Harvest Worth Cooking Properly
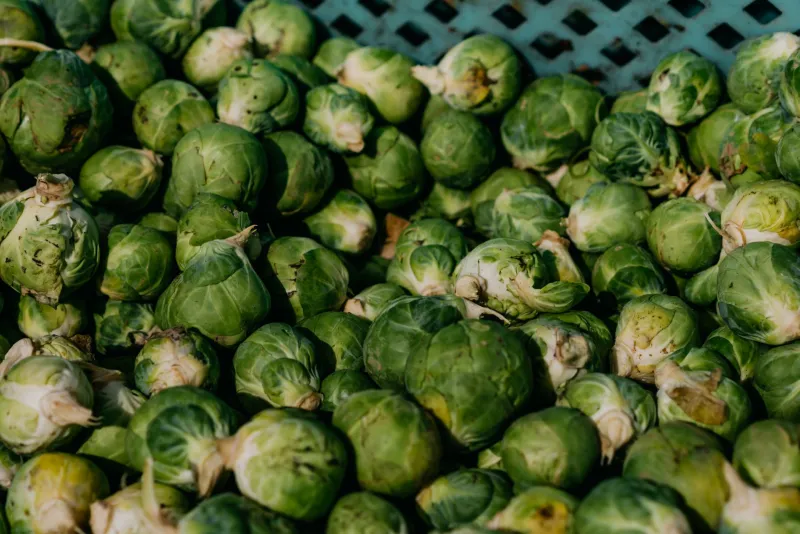
There is a particular November moment on the plot when the sprout plants look less like vegetables and more like tiny palm trees in woolly hats. The buttons are forming, the lower leaves are yellowing, and right at the top sits a loose, bright crown of leaves that many growers simply chop off and drop into the compost. That crown is the sprout top, and it deserves a better ending than the caddy.
It is not a new discovery, of course. Allotment holders have been cooking sprout tops for generations. But in a season when the supermarket shelves are filling with imported beans and the plot is offering mainly roots and brassicas, the sprout top is a genuinely useful green: sweet, tender, and quick enough for a weeknight. The trick is to harvest it thoughtfully and then treat it like a vegetable in its own right, not a by-product.
Why the top earns a knife, not the compost caddy
Sprout tops are the growing tip of the plant. Because they are still expanding, the leaves are softer and less sulphury than the buttons below. A touch of frost sweetens them further, which is why late November is such a good window. They cook in minutes, hold their shape when charred, and blitz into a soup that tastes far brighter than its muddy-green colour suggests.
They also make practical sense. If you are growing sprouts for Christmas, you may be tempted to leave every plant untouched until the big day. But topping a few plants in mid-November gives you a fresh green now, when the plot is thinning out, and it can ease the plant’s energy towards the buttons that are already set. The key is not to strip the whole row in one go.
How to take the top without robbing the sprouts
Choose plants that have firm, well-formed buttons lower down. With a clean sharp knife, cut the top crown about 10–15cm below the growing point, leaving plenty of leaf on the plant. Do not saw at it or crush the stem. Take tops from perhaps one in three plants, and leave the rest to carry on. If you are growing several varieties, start with the ones you plan to eat first.
Give the cut tops a quick soak in cold water to lift out any grit and the odd hidden aphid, then shake dry. They will keep in a loose bag in the fridge for a few days, but they are at their best within 48 hours. Wash them only when you are ready to cook — wet leaves go limp faster.
One caution: if your plants are still small or the buttons are only just forming, leave the tops alone. The plant needs that leaf area to keep growing. This is a harvest for established crops, not a rescue mission for a struggling row.
Treatment one: charred with hazelnut butter
This is the treatment that converts sprout-top sceptics. Heat the grill to high or set a heavy frying pan over a robust flame. Toss the dry tops with a little rapeseed oil and a pinch of salt. Char them in batches — don’t crowd the pan — until the edges are blistered and crisp in places, but the stems still have a little bite. It takes three to four minutes.
Meanwhile, melt a generous knob of butter in a small pan and add a handful of roughly chopped hazelnuts. Cook gently until the nuts smell toasty and the butter turns nut-brown. Add a squeeze of lemon and a little black pepper off the heat. Pile the charred greens onto a warm plate, spoon over the hazelnut butter, and finish with a little grated lemon zest. Serve alongside roast chicken, a baked potato, or simply a slice of good bread. The tops shrink dramatically, so cook more than you think you need.
Treatment two: a quick pickle for sandwiches
Sprout tops make an excellent quick pickle because they keep some crunch. Shred the leaves and tender stems finely — a mandoline is useful, but a sharp knife is fine. Pack them into a clean jar with a sliced shallot and a few black peppercorns.
In a small pan, warm 150ml cider vinegar, 100ml water, 1 teaspoon salt, and 1 tablespoon sugar until dissolved. Add a teaspoon of yellow mustard seeds and pour the hot liquor over the greens. Press them down so they are covered, leave to cool, then refrigerate. They are ready in an hour and will keep for a fortnight.
Use the pickle in a cheese sandwich with a little mustard, folded through leftover roast chicken, or alongside a baked camembert. The acidity cuts through the richness of November cooking, and the bright green flecks look cheerful on a grey day.
Treatment three: a bright midweek soup
For a soup that serves four, soften a chopped onion and a small potato in butter or olive oil. Add a grated garlic clove, then a big pile of roughly chopped sprout tops — around 300g. Stir until they wilt, add 700ml vegetable or chicken stock, and simmer for 12–15 minutes until the potato is tender.
Blitz until smooth, then taste. Add a squeeze of lemon, a little salt, and a grating of nutmeg. If it tastes a bit flat, a teaspoon of Dijon mustard usually sorts it out. Serve with toasted seeds, a swirl of cream, or a few crisp fried sprout-top leaves on top. It freezes well, which makes it a useful batch-cook for the run-up to Christmas.
The soup is also a good home for any tops that are slightly past their best. Wilting leaves can be revived in the pan, and the blitz hides a multitude of sins.
The plate-first mindset
The sprout top is a reminder that the garden does not always sort itself into neat categories of crop and waste. The leafy crown is not the poor relation of the button; it is a different vegetable with its own texture and timing. Once you start treating it as a centrepiece, the November plot feels a little more generous.
So next time you top a sprout plant, don’t head straight for the compost. Cut the crown cleanly, wash it well, and give it a hot pan, a sharp pickle, or a warm blender. The sprouts will carry on below, and supper will be better for it.